
Desktop setup · No heavy configuration
Install. Connect. Build.
Use TuxNest Desktop for projects, conversations, models, agents and reviewable changes in a standalone Windows workspace.
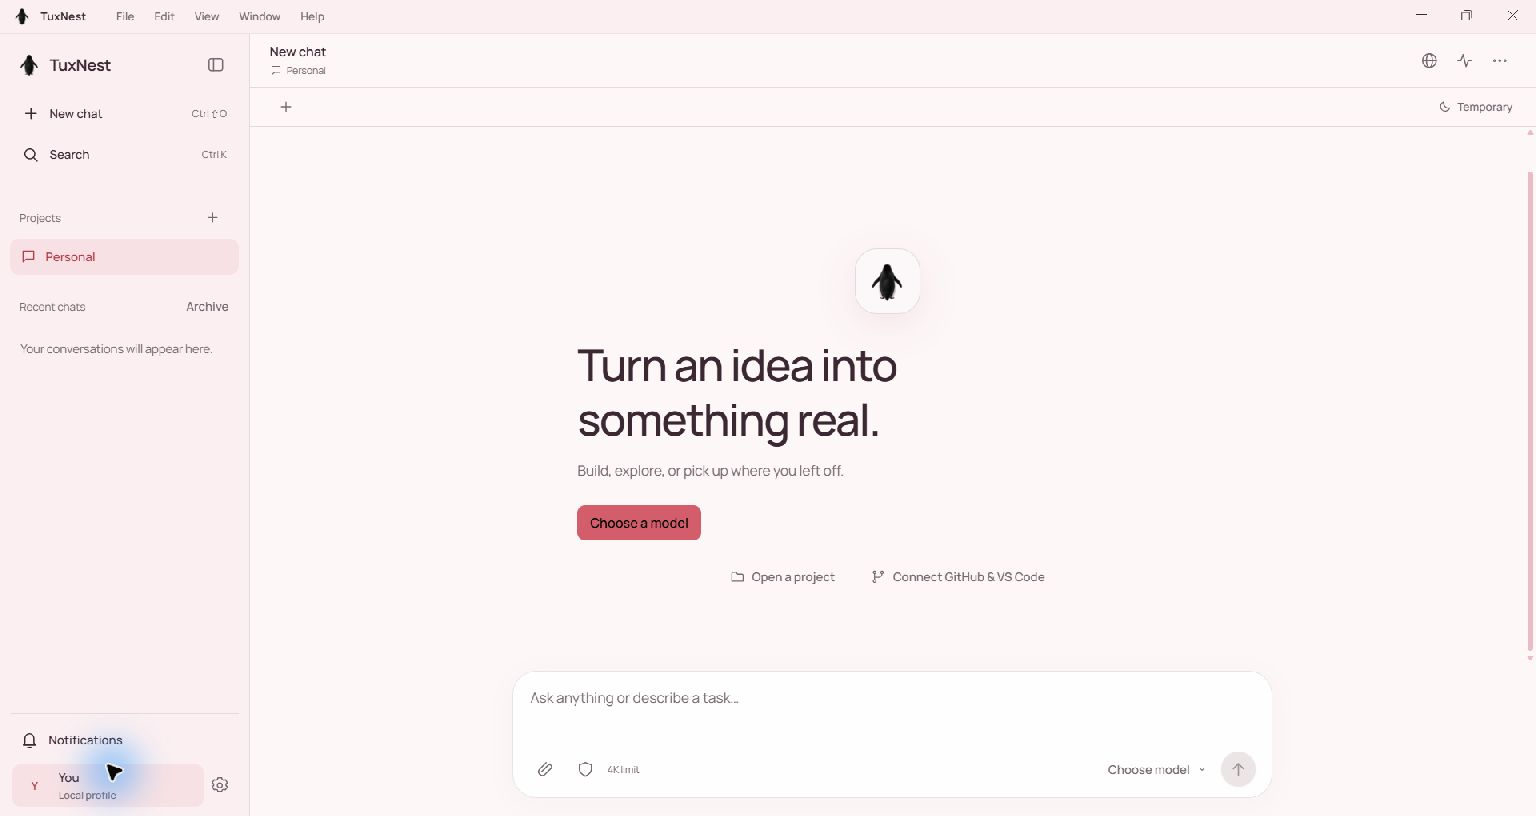
Get TuxNest Desktop →Actual application interface
Everything in one workspace.
Project sidebar, main canvas and composer are designed to help you move from a question to tangible, inspectable work.
Getting started
A simple route from install to results.
Install the Windows app
Use the Microsoft Store listing or the verified preview download. Check the release notes and your Windows version.
Connect your model
Select a running local Ollama model, a configured compatible endpoint, or a supported remote SSH model host.
Open a trusted project
Choose a workspace you control and start with a small, disposable task.
Review and verify
Check proposed changes, permissions, command output and any available tests before applying edits.
Frequently asked questions.
Do I need a dedicated GPU on this laptop?
No. A supported remote GPU host can provide inference if it is accessible, authorized and compatible. The laptop still needs to run the Desktop application and handle local tasks.
Will all prompts stay on my device?
Only when running local loopback inference without external integrations. Remote SSH and provider API modes send selected prompt context to the configured remote endpoint.
Is every provider free?
No. Some providers offer free tiers with limits, and others charge per usage. GPU hardware, electricity, bandwidth and maintenance also have costs.
Does the desktop automatically apply generated changes?
Review proposed edits and actual execution evidence. Security checks and compatibility can limit which tools or runtimes are available.